| |
 |
| |
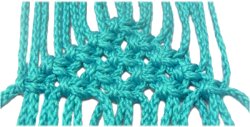
V Pattern # 2
|
| |
 |
|
| |
|
Alternating V Patterns are sometimes made with
the point inverted, so the widest area is in the
forward position.
This design is sometimes called an Increasing
ASK pattern, since you add
cords with
each new row.
|
| |
|
| |
|
|
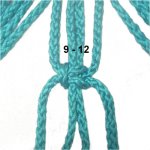
Step 1:
Tie the first ASK with cords 9
- 12, which will be in the center
of the group. |
|
| |
|
| |
|
|
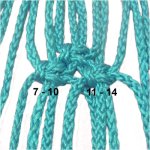
Step 2:
Tie the
2nd row of ASK with cords:
7
- 10 11
- 14
|
|
| |
|
| |
|
|
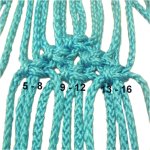
Step 3:
Tie the 3rd row of ASK with cords:
5
- 8 9 -
12 13 - 16
|
|
| |
|
| |
|
|
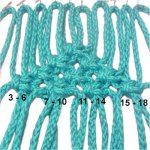
Step 4: Tie the
4th row of ASK with cords:
3
- 6 7 - 10
11 - 14
15 - 18
|
|
| |
| |
|
|
|
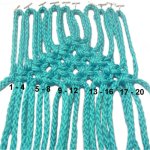
Step
5: Tie the 5th row of ASK
with all the cords:
1 - 4
5 - 8
9 -
12 13 -
16 17 - 20
|
|
|
|
| |
 |
| |
V Pattern # 3
|
| |
 |
|
| |
| |
|
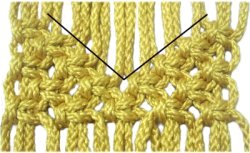
Alternating V Patterns like this one are usually
incorporated into a Macrame design where diagonal
lines are needed on the inside
rather than at the edges.
You might see a pattern like this when you have a
diamond shape followed by rows of ASK. The
knots will follow the diagonal slant of the lower
portion of the diamond.
|
|
| |
| |
|
|
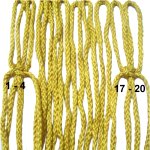
Step
1: Tie the first row of ASK with
cords:
1 - 4
and 17 - 20
|
|
| |
|
| |
|
|
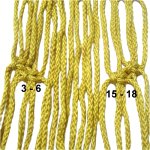
Step 2:
Tie the 2nd row of ASK with cords:
3 - 6
and 15 - 18
|
|
|
| |
| |
|
|
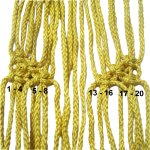
Step 3:
Tie the 3rd row of ASK with cords:
1 - 4
5 - 8
13 - 16
17 - 20
|
|
| |
| |
|
|
|
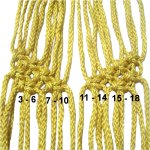
Step 4:
Tie the 4th row with cords:
3 - 6
7 - 10
11 - 14 15 -
18
|
|
| |
|
| |
|
|
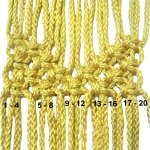
Step 5: The 5th row
should be tied with all the cords:
1
- 4 5-
8 9 - 12
13 - 16
17 - 20
|
|
| |
|
|
| |
 |
| |
V Pattern #4
|
| |
 |
|
| |
| |
|
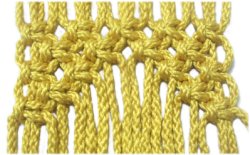
Some Alternating V Patterns are very popular.
I've seen this design used in curtains and wall
hangings.
You can form a diamond shape by making this
design first. Then add V Pattern #3 starting with
step 2.
|
| |
|
| |
|
|
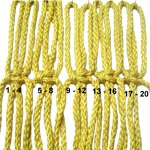
Step
1: Tie the first row of
ASK with all the cords:
1
- 4 5 - 8
9 - 12
13 - 16
17 - 20
|
|
| |
|
| |
|
|
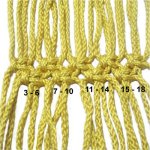
Step 2:
Tie the 2nd row of ASK with cords:
3 - 6
7 - 10
11 - 14
15 - 18
|
|
|
| |
| |
|
|
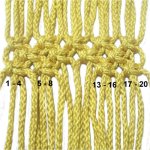
Step 3:
Tie
the 3rd
row of
ASK with cords:
1
- 4 5 - 8
13 - 16
17 - 20
Do not use
cords 9 - 12.
|
|
|
| |
| |
|
|
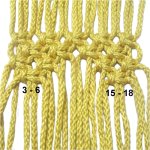
Step 4:
Tie the 4th row with cords:
3
- 6 and 15 -
18
|
|
| |
|
| |
|
|
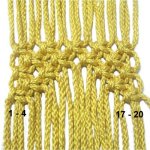
Step 5: Tie the 5th row
with cords:
1
- 4 and 17 -
20
|
|
| |
|
|
| |
 |
| |
| |
V Pattern # 5
|
| |
|
| |
| |
|
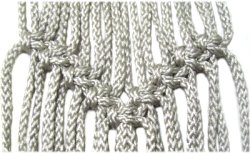
The last two Alternating V patterns feature
interconnected ASK in a single line, with two
diagonal edges. So there are no rows, just
individual knots.
This is a great pattern to use when you are
trying to make a Macrame project with very few
knots. The V shape really stands out.
Important:
Make sure the Square Knots do not tilt
on an angle. The bottom of each one should
be horizontal. Use the edge of your board as
a guide.
|
| |
|
| |
|
|
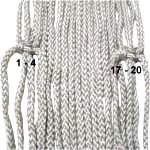
Step
1: Tie the first two ASK with
cords:
1
- 4 and
17 - 20
|
|
| |
|
| |
|
|
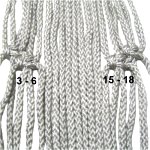
Step 2:
Tie the next pair of ASK with cords:
3 - 6
and 15 - 18
|
|
|
| |
| |
|
|
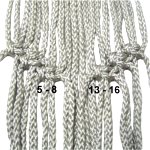
Step 3:
The next pair of ASK are tied with cords:
5
- 8 and 13 - 16
|
|
| |
|
| |
|
|
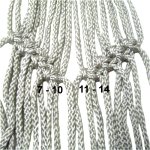
Step 4:
Tie the next ASK with cords:
7
- 10 and 11 - 14
|
|
| |
|
| |
|
|
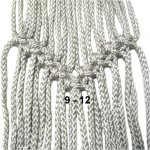
Step 5: Tie the last
ASK with cords
9 - 12.
|
|
| |
| |
|
| |
 |
| |
| |
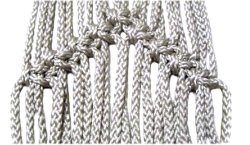
V Pattern #6
|
| |
|
| |
| |
|
This is the last of the Alternating V Patterns,
so your practicing is almost over!
This design is inverted, which means the wide
area is forward.
|
| |
|
| |
|
|
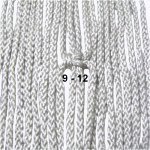
Step
1: Tie one ASK
with cords 9
- 12. |
|
| |
|
| |
|
|
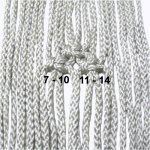
Step 2:
Tie a pair of ASK with cords:
7
- 10 and 11 -
14
|
|
| |
|
| |
|
|
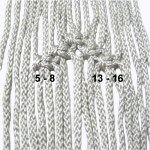
Step 3:
For the 2nd pair, use cords:
5 - 8 and 13 -
16
|
|
| |
|
| |
|
|
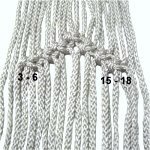
Step 4:
Tie the 3rd pair of ASK with cords:
3
- 6 and 15 -
18
|
|
| |
|
| |
|
|
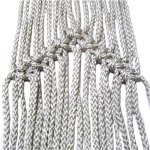
Step 5: The last pair
of ASK are tied with cords:
1
- 4 and 17 -
20
|
|
| |
| |
|
|
|
|
By
using any text or images on Free Macrame
Patterns, you are agreeing to our Terms
of Use
|
|
|
| |
|
Have
any comments about Alternating V Patterns? Contact
Me.
|
|
|
|

|
|
|
|


