|
|
| |
|
|
|
|
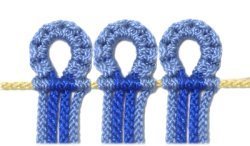
Description: Buttonhole
Scallops were a mounting process commonly used
in the early 1900s. So this technique is
considered a vintage knot.
Scallops form a finished edge along the top of
items like curtains and wall hangings, which are
the type of projects where they are most often
seen. But they can be used in any project
where you want a decorative edge.
Since the scallops need to be attached to
something, the Double
Half Hitch is part of the
overall design.
The primary decorative knot used to make
scallops is the Vertical
Larks Head.
Click on the links to practice both knots if
you are not familiar with them.
|
| |
| |
|
| |
Preparation:
To practice Buttonhole Scallops, you need one
holding cord and one working cord (primary
cords). You also need an additional cord to
hold the scallops.
In the images, the primary holding cord is dark
blue. The working cord is light blue.
When making Macrame projects with scallops, add at
least 18 inches to the length of the cords.
|
| |
|
|
Arrange the two primary cords vertically on your
board. Match the centers, which is where you
will start the Larks Head knots.
The holding cord should be placed to the right of
the working cord, with tension. Mark the
center with a pin. |
|
| |
| |
|
|
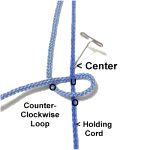
Step
1: Make a counter-clockwise
loop with the working cord, passing it over
- under the holding cord.
As you pull it left, pass over
the working cord to complete the loop.
Tighten firmly, so the knot is touching
the pin. |
|
|
| |
|
|
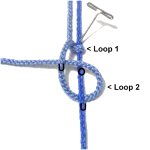
Step
2: The second loop for the
Vertical Larks Head knot is tied by
passing the working cord under
- over the holding cord.
Pull it left, and pass it under
the working cord.
Steps
1 + 2 = one Larks Head knot
|
|
| |
|
| |
|
|
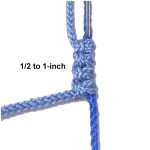
Step
3: Repeat
steps 1 and 2 to make a few more
knots, until the sennit is 1/2-inch to
1-inch long.
In a Macrame project, the length of the
Buttonhole Scallops is usually 1-inch, but
that depends on what you are making.
|
|
| |
|
| |
|
|
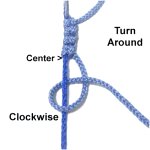
Step
4: To make the second
half of the scallop, turn the sennit
around so you start at the center again.
Use the other half of the cords to make
the same number of Larks Head
knots.
Rotate clockwise,
since the working cord is on the right.
|
|
| |
|
|
|
|
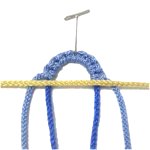
Step
5: Secure a holding
cord on your board horizontally.
Fold the sennit at the center to form
the scallop.
Place the knotted portion close to the
holding cord, with the cords under
it.
Give yourself some room by leaving the
scallop wide as shown.
|
|
| |
|
|
|
|
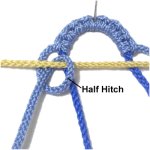
Step
6: Attach each of the cords
to the horizontal holding cord with a Double Half
Hitch.
This image shows only a single Half
Hitch. Make sure you tie two with
each cord.
When moving left to right, the two loops
should be tied counter-clockwise.
|
|
|
|
|
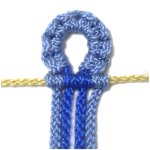
Step
6, continued: Make sure the
four DHH are close together when you are
finished.
Buttonhole Scallops are usually tied with
most of the cords you are mounting.
Since you are practicing, create a few
more and place them next to the first one.
|
|
| |
| |
|
|
|
| By using any
text or images on Free Macrame Patterns, you are
agreeing to our Terms of Use |
|
|
|
| Have
any comments about the Buttonhole Scallps? Contact
Me |
|
|
|

|
|
|
|


