|
|
| |
|
|
| |
|
Description: This Easy
Macrame Bracelet is perfect for children who are
just learning this craft. Its also a good
project for beginners, and for small groups.
The Square Knot is the primary decorative knot
used in Macrame. The ones tied in this
project are unique.
Most Square knots are tied around filler
cords. But this bracelet design
does
not have fillers,
which makes it even easier to create.
Any type of cord material can be used to make
this attractive bracelet. I used Nylon
Paracord in the bracelet shown because it's
smooth and comfortable.
Since this is a childrens project, be sure to
have them practice the 2 knots used in this
pattern, before
they get started.
|
| |
| |
| |
| Supplies
Needed: |
| |
- Project Board and pins (or Tape)
|
| |
|
|
| |
|
Step 1: Cut 1 cord, 60
inches long. Apply tape or glue to the
ends to prevent unraveling.
When using Paracord, an Adult
should apply
heat to the tips to melt the fibers and prevent
the core from being pulled out.
Do this in the
last step as well.
|
| |
| |
 |
|
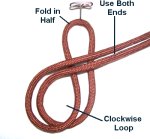
Fold the cord in half and secure it at
the center.
To start the Overhand Knot, use both
ends to make a clockwise
loop.
|
|
| |
|
| |
 |
|
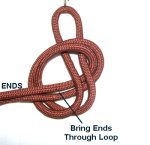
Step
2: Bring the ends through the
loop from below (right
to left). |
|
| |
|
| |
 |
|
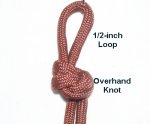
Step 3: Tighten the
knot slowly. Leave a 1/2-inch loop at
the top.
Secure the knot to your board or work
surface.
|
|
| |
| |
| |
|
The two ends will now be used to make Square
knots. There are no fillers,
which makes these knots a bit unusual.
Here are the steps you need to follow to tie
each knot:
|
| |
|
| |
 |
|
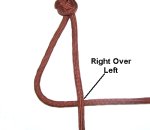
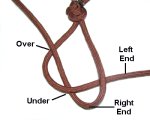
Step 4: Curve the left
end towards the right, so it's sideways
(horizontal).
Bring the right
end over
the left, straight down.
|
|
| |
|
| |
 |
|
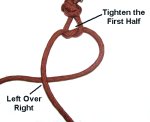
Bring the right
end under
the left, and then over
it further up, as you pull it
to the left.
|
|
| |
|
| |
 |
|
Tighten the first half of the Square
Knot by pulling on the ends. It should
rest just below the Overhand knot.
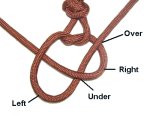
Curve the end now on the right,
so it's sideways. Then pass the left
end over
the right.
|
|
| |
|
| |
 |
|
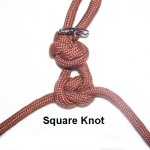
Move the left
end under
- over the right cord, as you
pull it right.
It's the same as the first half, only
the opposite direction (left to right).
Tighten the second half by pulling
gently on both ends.
|
|
|
|
|
| |
 |
|
The four steps above = one
Square Knot.
Repeat
step 4 several times, until the
Easy Macrame bracelet measures 5 to 8
inches long, or is the size you
want.
|
|
| |
|
| |
 |
|
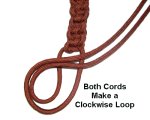
Step 5:
To make the clasp for your Easy Macrame
Bracelet, use both cords to make a clockwise
loop for the Overhand knot. |
|
| |
|
| |
 |
|
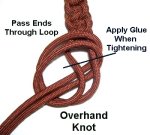
Step 6: Pass the ends
through the loop from below.
Before you tighten
the Overhand knot, apply glue, so
it's inside
the knot.
Add more glue to the outside. When it's
dry, cut off the excess material. |
|
| |
|
| |
 |
|
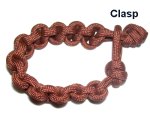
The Overhand
Knot fits through the loop at the other
end of the Easy Macrame Bracelet. |
|
| |
| |
|
|
|
By
using any text or images on Free Macrame
Patterns, you are agreeing to our Terms
of Use
|
|
|
| |
|
Have
any comments about the Easy Macrame Bracelet?
Contact
Me.
|
|
|
|

|
|
|
|


