Cut
two cords to the length
described in the instructions below,
since each Key Keepers design requires
different lengths.Prepare
the tips to prevent unraveling.
Nylon Parachute cord was used in the examples
shown. It requires special preparation if
you want to use it.
Read the page called Cord Preparation
to learn how to prepare and finish off this
material. The instructions are near the bottom of
the page.
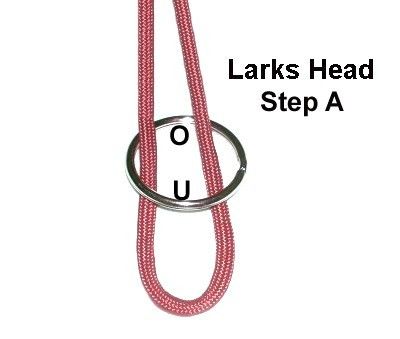
Mount the cords to the ring with Larks Head Knots
as described below:
LH
Step A: Fold one cord in
half and place it into the ring from the
top (over
- under).
The fold should be heading toward you.
LH
Step B: Move both halves
forward (toward you) and pass them under
the folded area.
Tighten by pulling on both halves firmly.
Square Knot Instructions
All the Key Keepers described on this page are
made with the Square Knot
(SK). The instructions are described in steps A - D
below.
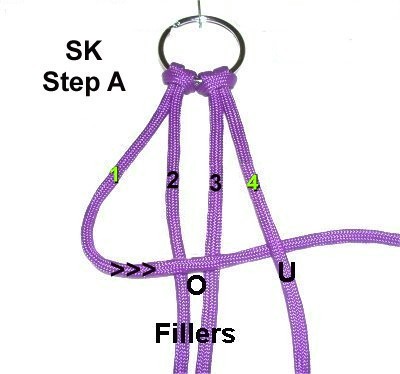
Mentally number the four cords. The working
cords are 1 and 4, which are marked with green
numbers in the images below.
The fillers are cords 2 and 3.
SK Step A: Move cord
1 to the right,
passing it over
the fillers and under
cord 4.
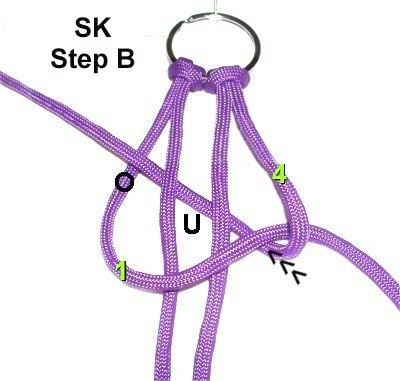
SK
Step B: Move cord
4 to the left,
passing it under
the fillers and over
cord 1.
Pull both working cords to tighten the
first half of the SK.
SK Step C: The two working
cords have switched places.
Move cord
1 to the left,
passing over
the fillers and under
cord 4.
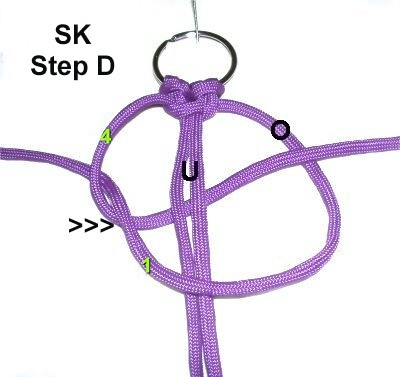
SK
Step D: Move cord
4 to the right,
passing it under
the fillers and over
cord 1.
Pull both working cords to tighten the
SK. Make sure it's firm.
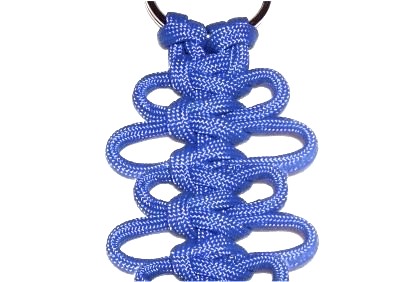
Key Keepers - Basic Design
Before
making each of the designs shown below,
you should decide how you want to arrange
the picots.
This basic design shows you how to make
picots in different sizes.
Cut
2 cords, each at least 45 inches long.
Mount them to the key ring as described
previously (LH
Steps A and B).
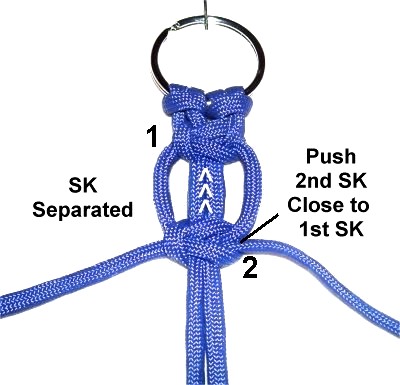
Step
1: Tie the first Square Knot
close to the Larks Head knots (SK
steps A - D).
Tie the second Square Knot 1-inch
away from the first SK, so they
are separated.
Push the second SK backward
so it rests next to the first SK.
This forms the first set of picot loops.
Step
2: To change the size of
the next two picots, increase
the distancebetween
the 2nd and 3rd SK toat
least1.5
- 2 inches.
Tie the 3rd Square Knot, then push it
backward to rest next to the 2nd SK.
Step
3: Repeat
steps 1 and 2several
times, until the working cords are around
4 inches long.
(Optional) You can change the sizes of the
picots simply by changing the distance
between each knot.
Step 3,
continued: The best way to finish
most of the Key Keepers on this page is by adding
beads near the end of each cord, then tie Barrel
Knots to hold them in place.
Don't forget to treat the tips of the cords after
you cut off the excess material.
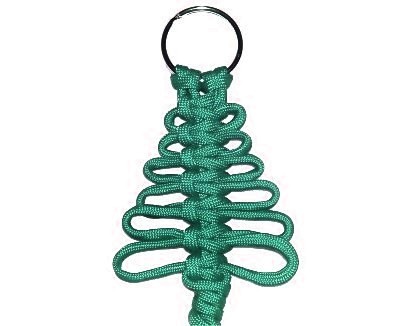
Tree Shaped Design
Key Keepers
are great gifts for the holidays,
especially this tree-shaped design.
You can add beads prior to tying each SK,
which will represent the lights of a
Christmas tree.
The key to success for this design is to
increase the distance between the knots
carefully. Make sure you use a tape
measure so you are accurate.
Step 1:Cut
two cords at least 60 inches long.
Prepare the tips to prevent unraveling.
Mount them to the ring with Larks Head Knots as
previously described.
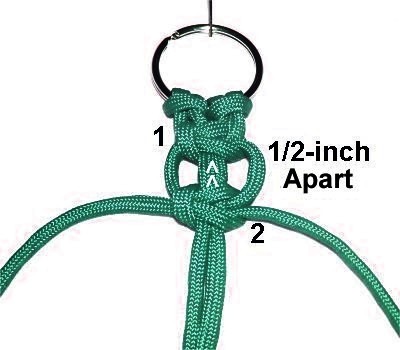
Step
1: Tie one Square knot,
tightening it so it rests next to the
mounting knots.
Tie
the second
SK so it rests 1/2-inch
from the first knot.
Slide the second knot backward so it
touches the first knot. The
picots will be very small.
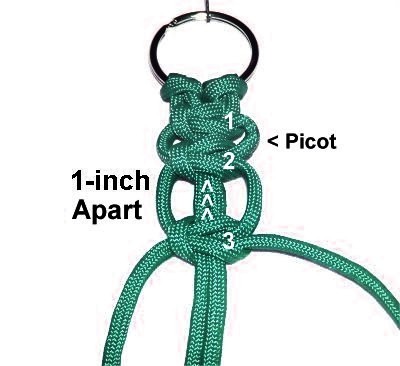
Step
2:Tie
the third
SK so it rests 1-inch
from the second knot.
Move it backward to form the next set of
picots, which will be larger.
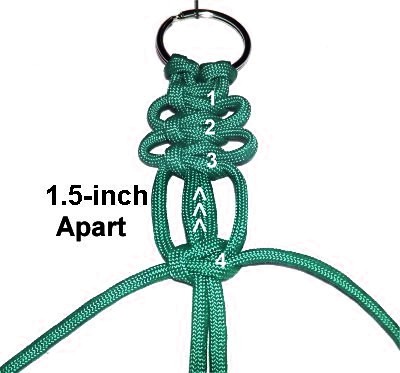
Step
3: Tie
the fourth
SK so it rests 1.5
inches from the third SK.
Move it backward to form the next set of
picots.
Repeat
this step at least 2 more times,
increasing the distance between the SK by
1/2-inch
each time.
Step
4: Pass working
cord 1over
cords 2 - 4, then continue to wrap around
them 3 - 4 times.
Pull a portion of the last wrap to the
side. Pass cord 1 under
- over cords 2 - 4, then under
the portion you pulled. Tighten
firmly.
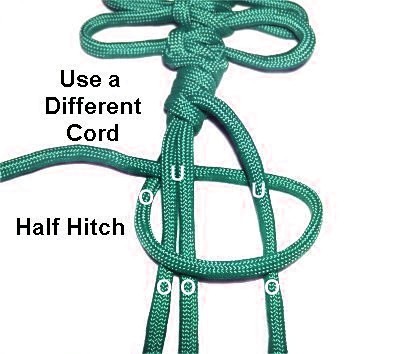
Step
5: Select a different cord.
Bring it around the other three cords to
make a counter-clockwise
Half Hitch. It should pass over
the other three cords first, then under
them.
To complete the loop, pass over
the cord you are using as you pull it
left.
Finishing:
Key Keepers need to be finished so they hold up
with use. For this design, I recommend
you tie off the cords with a finishing knot rather
than use beads. The knot should be placed
close to the Half Hitch.
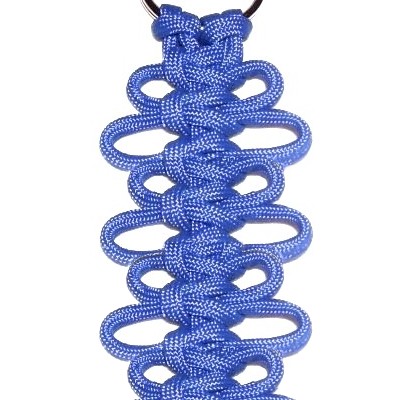
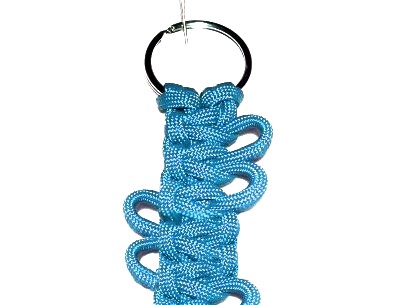
Key Keepers
can be made so the picot loops are on one
side or the other.
In this design, the loops change direction
every two knots.
This vintage pattern is frequently seen in
Macrame projects of the 1800's.
Step 1: Cut
two cords, each at least 45 inches long.
Mount the cords to a ring as you did with the
designs shown above.
Tie the first Square Knot so it rests next
to the mounting knots.
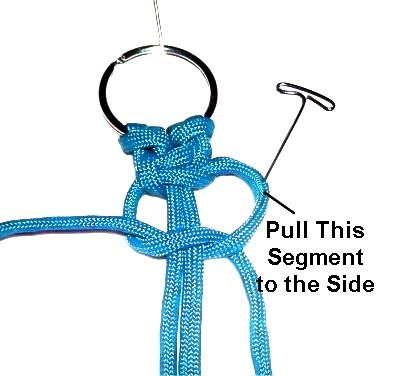
Step 2:
Tie the first
half of a Square Knot, which is
shown in the SK instructions for steps
A and B.
Pull a segment of the
right working cord to the side
and secure it with a pin.
Try to pull it at least 1/2 to 1-inch from
the fillers.
Step 3:
Tie the second
half of the same
SK (steps C and D), making sure the
secured segment remains in place.
Both the first and second SK should be close to
one another and there should only be a picot on
the right.
Designer's
Tip: What makes this Square Knot
pattern different from the other two shown
previously is that the knots are close together
without any added space between them.
The picot is formed when you pull the cord to the
side.
Step
4: Repeat
step 2 to tie the next
SK.
When you tighten it, make sure the left edge
is flat (no picot).
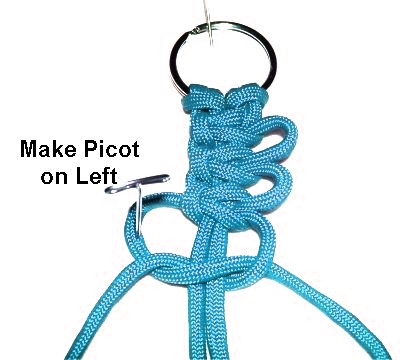
Step
5: Now it's time to change
sides.
Tie the first
half of the next Square knot,
then pull a portion of the left
working cord to the side.
Tie the second
half of the knot, making sure
the right
edge is flat.
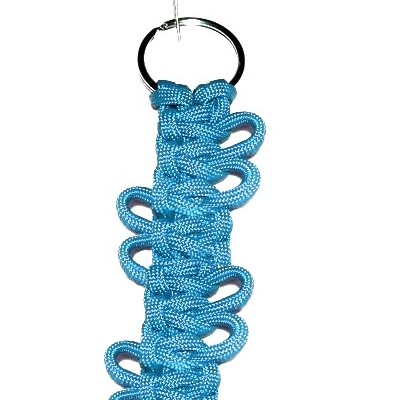
Step
6: Repeat
steps 2 -5 at least one more
time.
All the Key Keepers need to be finished in
some way, so use beads or other decorative
knots to secure the ends.
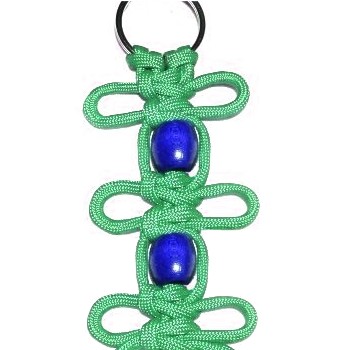
Beaded Design A
The next two
picot designs show what you can do with
beads, which are placed between the
knots.
In this first design, the beads are placed
between the picots.
Since it takes two SK to make one set of
picot loops, the beads are placed every
other knot.
Step 1: Cut 2 cords, each at
least 50 inches long.
Mount both cords to a key ring following the
mounting instructions previously used.
Tie one SK next to the Larks Head knots. Tie
a second knot 1-inch from the first one.
Slide the knot backward, so it rests against the
first SK.
Step
2: Add a bead to both filler cords.
Tie the third Square Knot. Tighten it
firmly so it rests against the bead.
Tie the fourth SK 1-inch from the third
knot. Slide it backward to form the
picots.
Step
3: Repeat
step 2 at least one more
time.
Key Keepers look great if you finish by
adding beads near the tips of the cords.
European style beads are just the right
size if you are using Paracord or other
thick material. The hole size is
usually 5 mm.
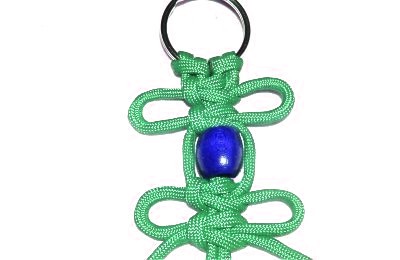
Beaded Design B
This beaded
design features beads between each Square
Knot, so the picots surround the beads.
The knots should be tied more tightly than
usual, so they don't slide as much.
The picots will be longer than the others
previously made (top to
bottom).
Step 1: Cut two cords, each at
least 60 inches long.
Mount the cords to a key ring with Larks Head
knots.
Tie the first SK so it rests against the mounting
knots.
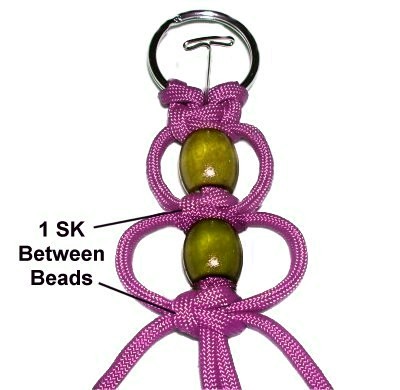
Step
2: Place a bead onto the filler
cords.
Tie another Square Knot, tightening it so
it rests 1-inch
from the bead.
Slide it backward so it rests against the
bead, forming a picot around the bead.
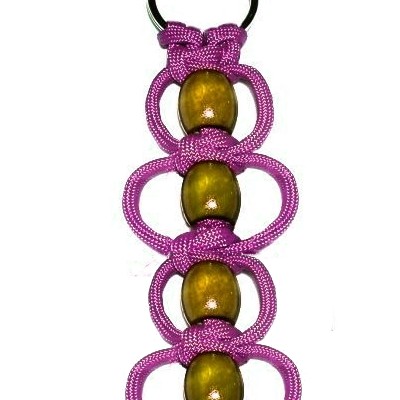
Step
3:Repeat
step 2.
You can change the size of the picots by
tightening the knot 1.5
to 2 inches from the bead.
Step
4: Repeat
step 2 at least one more
time.
Finish off the cords with additional beads
and finishing knots.
By using any text
or images on Free Macrame Patterns, you are
agreeing to ourTerms of Use