Lambda Knot
|
| |
|
| |
| |
|
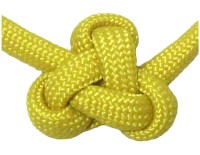
Description: The Lambda Knot
features three loops surrounding a triangular
design in the center.
This decorative knot looks great as a focal
point for a bracelet or necklace design.
The material used in the example shown is 550
size Paracord.
|
| |
|
|
A video tutorial for this interesting
knot can be found in the video gallery
of Fusion
Knots.
Click on
this image or link to visit the website.
|
|
|
|
| |
|
|
|
|
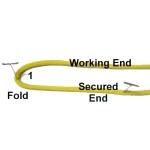
| Step 1: To practice, you need
one cord, 36 inches long. Secure one end to your
board, on your right. |
|
| |
|
|
Four
to six inches from the secured
end, fold the cord, then bring it back
to the right.
The long portion is the working
end. Mentally label the folded
area (1).
|
|
| |
|
|
Designer's
Tip: You can start the Lambda knot
anywhere on the cord.
So if you are trying to get it close to the
center, start it there. |
|
|
| |
|
|
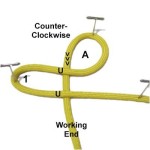
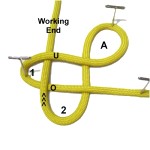
Step 2: Make a counter-clockwise
loop (A) with the working end.
Move the working end forward
vertically, passing under
both parts of folded area 1.
|
|
| |
|
| |
|
|
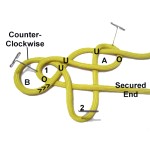
Step 3: Move the
working end slightly to the left, then
curve it to create another folded area
(2).
Moving backward vertically, pass it over
- under folded area 1. |
|
| |
|
| |
|
|
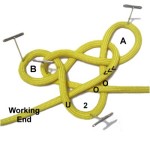
Step 4: Make a counter-clockwise
loop (B) around
folded area 1.
Bring the working end over
folded area 1, then under
the next two segments as you move it
diagonally left to right.
Pass it through loop A under
- over (from below).
|
|
| |
|
| |
|
|
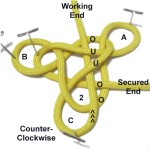
Step 5: Move the
working end to the left diagonally,
passing over
the right side of fold 2.
Bring it over
the secured end, and under
the left side of fold 2.
|
|
| |
|
| |
|
|
Step
6: Make another counter-clockwise
loop (C) with the working end.
Bring it through the knot vertically,
passing over
the second fold, over
the secured end, and under
the next two segments.
Pass over
the last segment.
|
|
| |
|
| |
|
|
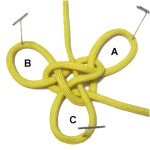
Step
7: Tighten up the center
slightly, keeping the pins on the three
loops. |
|
| |
|
|
|
|
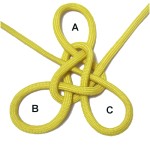
Step
8: The Lambda knot is a
triangle, so should be arranged that way
prior to tightening.
Loop A should be vertical, and closest to
the back of the board. |
|
|
|
| |
|
|
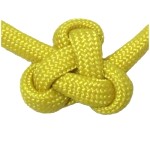
Step 9: Tighten
the knot beginning at the secured end,
removing the slack gradually until the
knot is firm. |
|
| |
| |
|
|
|
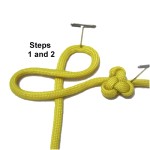
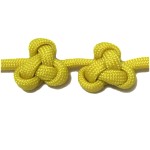
To make
another knot, secure the first one on the
right.
Fold the working end towards the left
(step 1), then repeat
steps 2 - 9. |
|
|
|
|
|
|
When you
tighten the second knot, leave a little
space between it and the first one.
This type of knot looks better if there is
a gap between each one. You can also
place beads between them. |
|
|
|
|
|
By using any text
or images on Free Macrame Patterns, you are
agreeing to our Terms of Use
|
|
|
| |
|
Have
any comments about the Lambda Knot? Contact
Me.
|
|
|
|

|
|
| |
| |


