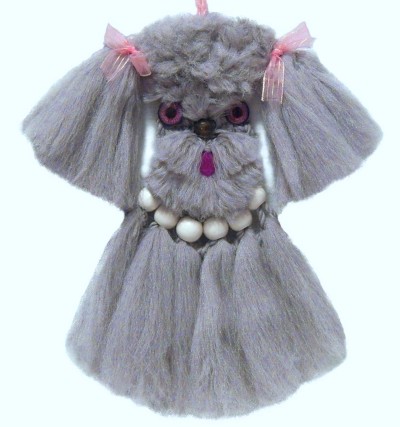
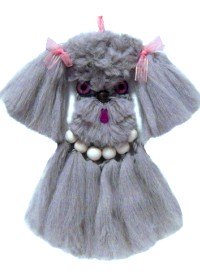
Macrame Mutt
|
|
|
|
Description:
This Macrame Mutt started out as a poodle,
but rapidly began to look like a mixture
of breeds.
You can change the appearance of this
Macrame decoration by using different
colors and/or changing the haircut.
This pattern features brushed fringe
forming the fur and body. The beads
at the neck represent a collar.
This Macrame project is rated easy, but is
time consuming due to the brushing
required. |
|
|
| |
Supplies
Needed:
- 6mm Cord Material that can be unraveled (30
yards)
- Six 20mm - 25mm round beads for collar
|
| |
|
Knots
Used:
|
|
|
|
Preparation:
- Face:
Cut 6 cords, each 2 yards long
- Ears:
Cut 10 cords, each 18 inches long
- Body:
Cut 6 cords, 18 inches long
- Ring:
Cut 2 cords, 2 yards long
Small pieces for the fur of the Macrame Mutt
are cut after step 7, and their length will vary
depending on the area.
Prepare the 2-yard
cords with tape to temporarily prevent
unraveling.
|
|
|
|
|
|
|
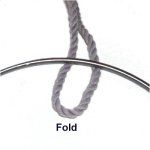
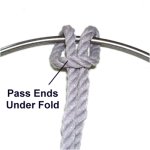
Step
1: Fold one of the cords for the
face and place it under
the top area of the ring. |
|
|
|
|
|
Bring both
halves over
the ring, and under
the folded area.
Pull firmly to tighten the Larks Head
knot. |
|
|
|
| |
Repeat this process to
mount the other 5 cords for the face of your
Macrame Mutt.
|
|
|
|
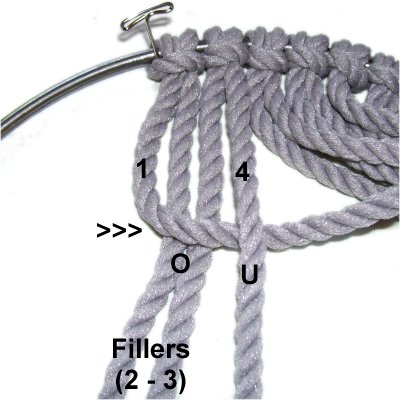
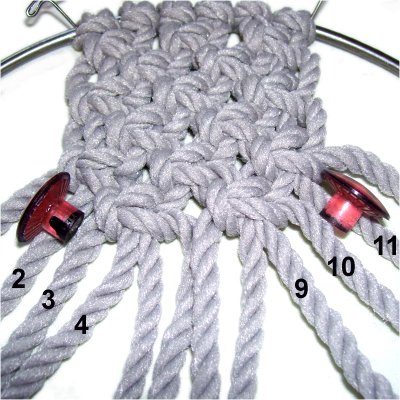
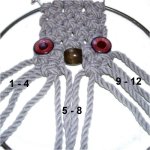
Step 2:
Tie a row of Alternating Square Knots, using 4
cords per knot.
The four steps for the all the Square Knots are
described in steps A - D below: |
|
|
|
|
|
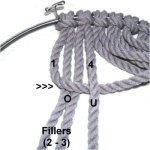
Step A:
Mentally number the first four
cords.
Move cord
1 to the right,
over
cords 2 - 3 and under
cord 4. |
|
|
|
|
|
|
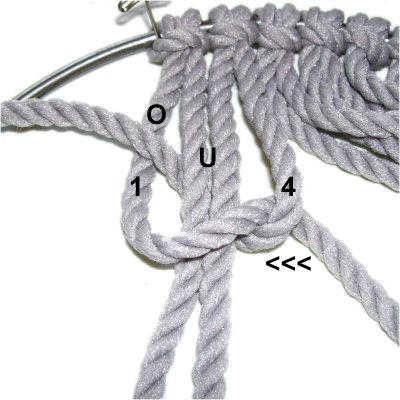
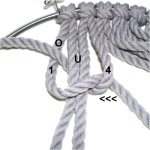
Step
B: Move cord
4 under
2 - 3. As you pull it out on the left,
pass it over
cord 1.
Pull the cords firmly to tighten the knot. |
|
|
|
|
|
|
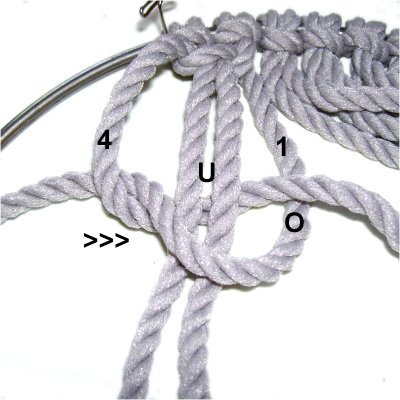
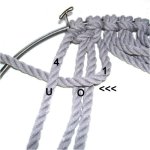
Step
C: Cords 1 and 4 have
switched places.
Move cord
1 to the left,
passing it over
cords 2 - 3 and under
cord 4.
|
|
|
|
|
|
Step
D: Move cord
4 to the right,
passing it under
cords 2 - 3 and over
cord 1 as you pull it out on the
right.
Tighten firmly. |
|
|
|
|
Step 2,
continued: Repeat the same process
with cords
5 - 8.
Repeat again with working cords
9 - 12. |
|
|
|
|
|
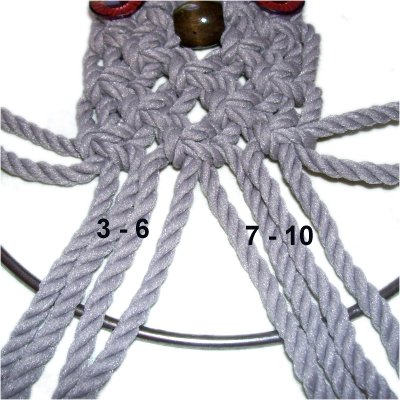
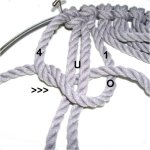
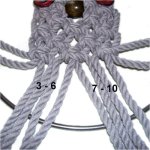
Step
3: The second row is tied
after the cords are alternated:
One SK using cords
3 - 6.
One SK using cords
7 - 10.
|
|
|
|
Step 4:
|
|
|
|

|
|
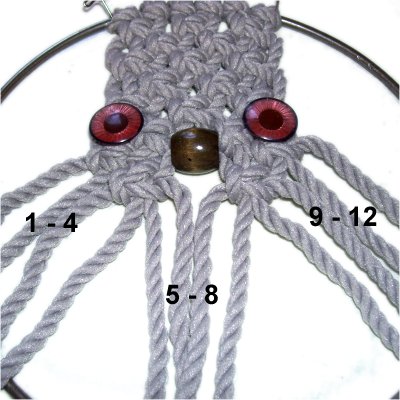
The eyes
should be placed between cords
2 - 3, as well as cords
10
- 11.
Some eyes require glue, others have
washers. So use the appropriate method to
attach them.
Tie a SK below each eye, using cords
1 - 4 and 9
- 12.
|
|
|
|
|

|
|
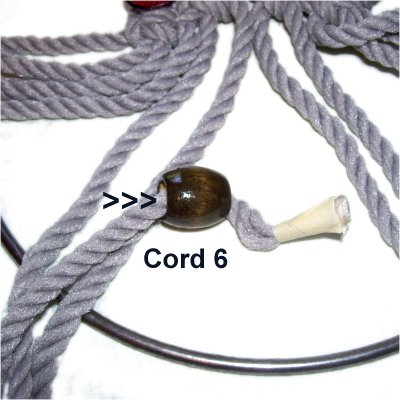
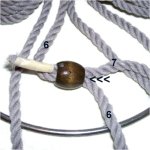
Step
5: Pass cord
6 through the bead for the nose,
from left
to right. |
|
|
|
|
|
Pass cord
7 through the bead from right
to left.
Pull both cords and position the bead slightly
below the eyes. |
|
|
|
|
|
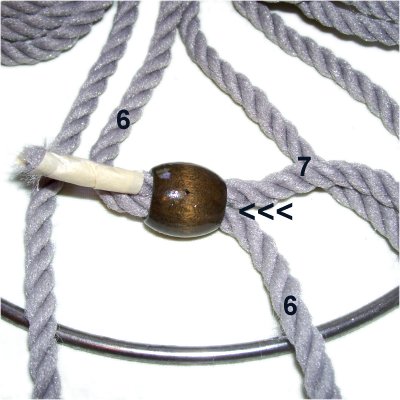
|
Mentally
re-number the cords. Secure the nose
by tying SK with cords
3 - 6 and 7
- 10.
|
|
| |
|
|
|
|
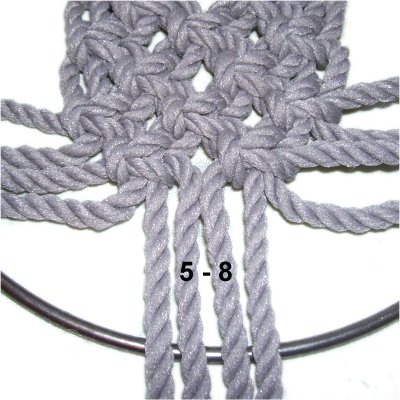
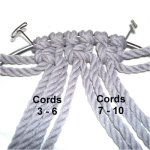
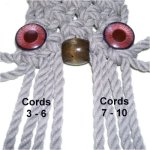
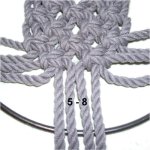
Step
6: The next row of Square
Knots for the lower face of your Macrame
Mutt is tied with cords
1 - 4,
5 - 8, and
9 - 12. |
|
|
|
|
|
|
Tie
the next row of ASK with cords
3 - 6 and 7
- 10.
|
|
|
|
|
|
Use cords
5 - 8 to tie the final knot for
the face of your Macrame Mutt.
|
|
|
|
|
|
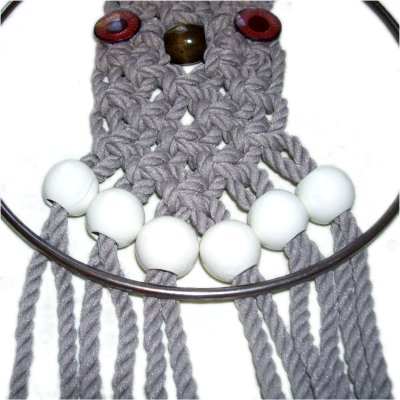
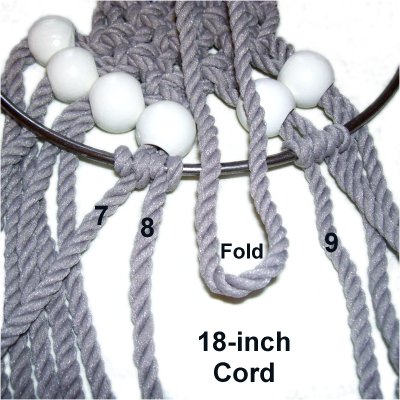
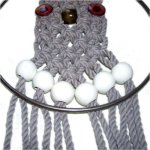
Step
7: Slide the beads for the
collar onto the cords, in sets of two.
Place the cords under
the lower portion of the ring. When
you stretch them, the beads should rest
against the ring.
|
|
|
|

|
|
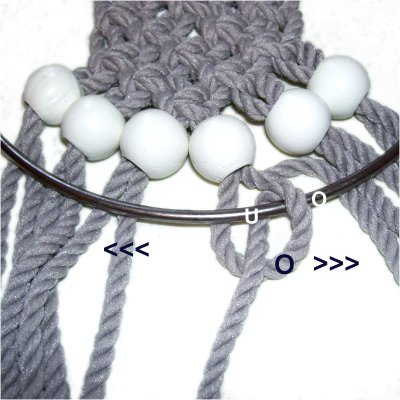
Attach cords
7 - 8 to the ring with DHH.
The image shows a single Half Hitch; you
need to tie 2 to make it a double.
Rotate the cord counter-clockwise,
heading right.
|
|
|
|
|
|
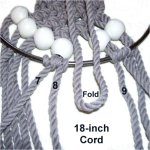
Fold one
18-inch cord for the body. Place it
on top
of the ring, between cords
8 and 9.
|
|
|
|
|
|
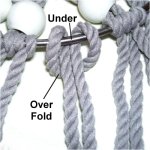
Bring both
halves under
the ring.
Pull it out over
the fold to complete the reverse
Larks Head. |
|
|
|
|
Attach cords
9 - 10 with DHH, then add a new cord to
the ring with a reverse Larks Head as shown above.
Attach cords
11 - 12 with DHH. |
|
|
|
|
|
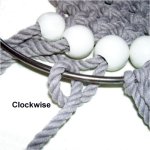
To the left of
the center, the DHH are tied in a clockwise
direction, since you move right to left.
Add a new cord between each set of DHH
tied with the cords coming from the
beads.
The first one is placed between cords 6
and 7.
|
|
|
|
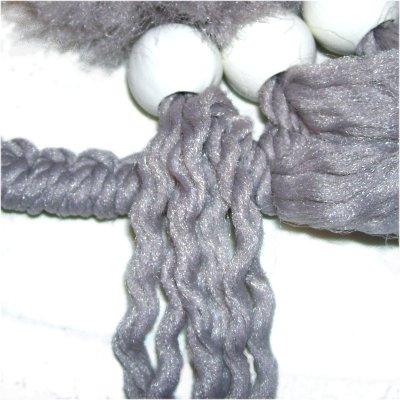
Trim all the cords coming from the lower ring to
6 - 8 inches.
Save
the scraps so you can use them on the
face of the Macrame Mutt. |
|
|
|
|
|
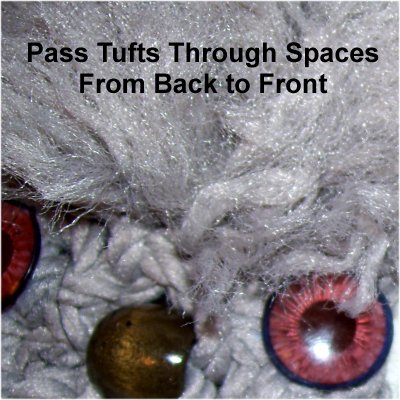
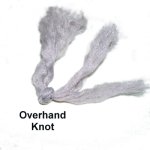
Step
8: Cut the scraps into
5-inch pieces. Tie an Overhand knot
in the center.
Unravel and brush the fibers until smooth.
I will refer to these as "Tufts". |
|
|
|

|
|
Near the upper
part of the ring, pass several tufts
through SMALL spaces between the
knots.
Both ends should come through the same
space, with the knot positioned in the
back of the design. Add a few around
the eyes as well.
Make sure you cover as much of the ring as
possible. |
|
|
| |

|
|
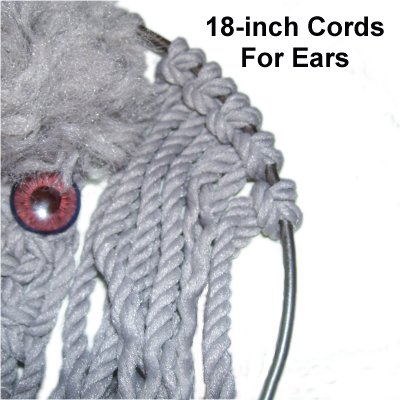
Mount the
18-inch cords for the ears to the ring
with Larks Heads knots.
Five are placed to the right of the cords
already present, and five to the left.
|
|
|
|
Step 9:
Attach the 2-yard cord onto the exposed portion of
the ring, with a Larks Head knot.
Place it half way between the ear cords and the
ones on the bottom. It will be used to cover
the ring.
Tie a series of Vertical Larks Head knots with
each half, as shown below. When you are
done, the remaining material becomes part of the
ears and body. |
|
|
|

|
|
Pass the
cord over
- under the ring.
As you pull it toward you, bring it over
the cord.
|
|
|
|
|
|
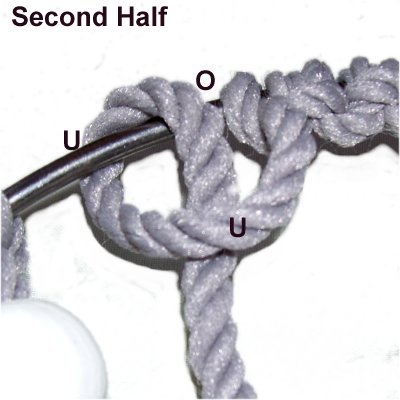
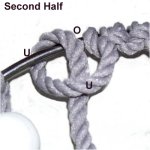
|
For the second
half, move the cord under
- over the ring, and under
the cord. |
|
|
|
|

|
|
Step
10: Cut a small piece of
felt into a tongue shape.
Work your tweezers through the middle of
the Square Knot directly below the nose
bead.
Slide a portion of the tongue through that
space, and apply glue to adhere it to the
back of the Macrame Mutt. |
|
|
|
Step 11:
Attach more tufts to the area between the eyes and
nose, which is indicated by the black circle in
the image above.
Add more to the area above and below the tongue,
forming the whiskers.
Trim, unravel, and brush the fibers into the
appropriate cut for your design. |
|
|
|
Step 12:
The added cords for the body (from step 7) are not
included in this step. Use only the cords
coming from the face.
|
|
|
|
|
|
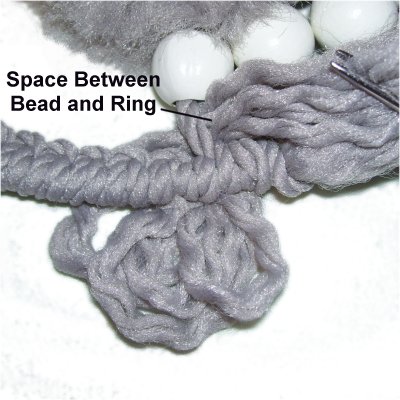
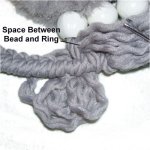
Locate the space between the collar bead
and the ring, between the two cords that
were used to make the face.
The ends of those cords are brought under
the ring and through that space (back to
front).
|
|
|
| |
|
|
|
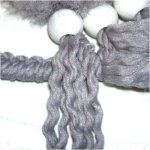
The cords
coming from the beads will rest in front
of the ring, covering it.
To finish the Macrame Mutt, unravel and
brush all the fibers in the body, ears,
and face. Trim the fibers to the
desired length and design.
Add the ribbons and wire for hanging. |
|
|
|
|
|
|
By
using any text or images on Free Macrame
Patterns, you are agreeing to our Terms
of Use
|
|
|
|
|
|
Have
any comments about the Macrame Mutt? Contact
Me.
|
|
|
| |
 |
| |
| |