|
|
| |
|
|
|
Description:
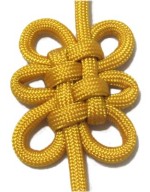
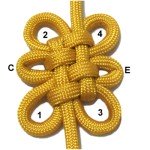
The Oblong Knot is a variation of the Mystic Knot.
It's also related to the Cloverleaf
Knot.
This Chinese knot has a rectangular area
in the center, with loops that surround
it.
You can leave the loops large, as shown in
the example, or tighten them
completely.
|
|
|
|
| |
|
|
Step
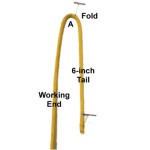
1: Cut a 60-inch cord to
practice the Oblong Knot.
Fold the cord 6 inches from one end, and
arrange it vertically so the working end
is on the left. Secure the fold and
the tail. Mentally label it fold
A. |
|
| |
|
| |
| |
|
|
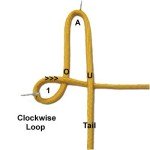
Make
a clockwise
loop with the working end, and mentally
label it loop
1.
Pass it over
the working end to make the crossing
point, then bring it under
the secured tail.
Make sure it rests half way between fold A
and the secured tail.
|
|
| |
|
|
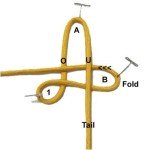
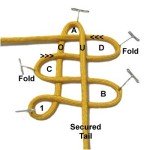
Step
2: Move the working end under
- over the two vertical segments,
heading left.
Mentally label it fold
B.
|
|
| |
|
| |
|
|
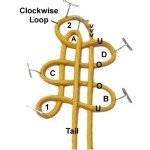
Move the working
end to the right, over
- under the two vertical
segments.
Fold the cord, then move it to the left, under
- over the two segments.
Mentally label fold
C on the left and fold
D on the right.
|
|
| |
|
| |
|
|
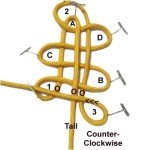
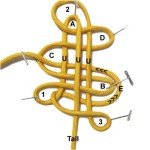
Step
3: Make a clockwise
loop with the working end, passing around fold A.
Mentally label it loop
2.
Move the cord toward the front of the
board, passing under
- over fold
D, and over
- under fold
B.
|
|
| |
|
| |
|
|
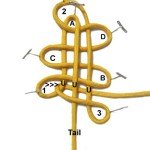
Step
4: Make a counter-clockwise
loop with the working end.
Mentally label it loop
3.
Move it over
all three vertical segments as you bring
it towards loop
1 on the left.
|
|
| |
|
|
|
|
Push fold
B and loop
3 apart, to create some space
between them.
Move the working end to the right,
passing under
the three vertical segments in the space
you created.
|
|
| |
|
|
|
|
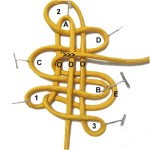
Step
5: Create some space
between folds
B and D.
Move the working end around
fold B,
and mentally label that area fold
E.
Bring it under
the three vertical segments as you move it
to the left towards fold
C.
|
|
|
|
|
Move the
working end to the right, passing over
the three vertical segments.
This takes place between folds
E and D.
|
|
| |
|
|
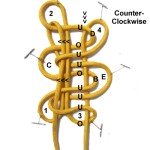
Step 5,
continued: Before moving on to the
final steps for the Oblong Knot, make sure you can
clearly see all the loops and folds, spreading
them apart as needed.
You can remove some of the pins, but make sure you
keep the loops
secured, along with folds
C and E.
Push the vertical segments to the left, so you
have plenty of room for the next area of vertical
weaving. See
the next image below (<<< arrows). |
|
|
| |
|
|
Step
6: Make a
counter-clockwise loop with the
working end, going around
fold D.
Bring it forward, passing under
- over fold
D, under
the next segment, and under
fold E.
Pass it over
- under fold
B, under
fold E,
and through loop
3 under
- over.
|
|
| |
|
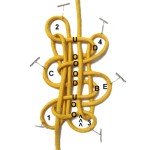
Step 6,
continued: Push the segment you
were just weaving to the right, so there is space
between it and the vertical segments on the left.
Make sure you can clearly see the folds and loops
on the right side of the knot. |
|
| |
|
|
Step
7: Bring the working end to
the left of the vertical segment from step
6.
Moving backward, pass it over
loop 3,
over
fold E,
and under
- over fold
B.
Pass it over
the next two segments, then over
- under fold
D.
|
|
| |
|
|
Step 8:
Tightening the Oblong Knot can be challenging, so
here are some tips:
- Keep the four loops secured by leaning the
pins backward over them. Also
secure folds C and E.
- Start at the tail and slowly remove most of
the slack. When you get to the secured
parts, just reduce the size, and tuck them
against the pins. Keep doing this until
the center section is completely tightened.
- You have the option of tightening all the
loops and folds completely, which is
easier. You can also tighten folds C and
E and leave only the four loops.
|
|
| |
|
|
Once the
center is tightened, pull on the four
loops and two folded areas until they are
the size you want.
|
|
| |
|
| |
|
|
| By using any
text or images on Free Macrame Patterns, you are
agreeing to our Terms of Use |
|
|
|
| Have
any comments about the Oblong Knot? Contact Me. |
|
|
|

|
|
| |
|


